Post by mpc2163 on Oct 6, 2012 22:20:21 GMT -5
Here's the writeup of the NT:BR game I just ran a few hours ago at Nav-Con. It went pretty well, especially since all the players had some experience with Naval Thunder. Enjoy!
The basic premise was a real attempt the American Pacific Fleet made to raid the newly captured Japanese port of Rabaul, which became their most important possession in the Southeast Pacific region. But at this point in the war it has just been captured and has yet to be properly fortified. Because of that, Allied command sent Task Force 11, centered on the old carrier USS Lexington, to bomb the base and any warships anchored there.
Historically, the Japanese spotted the Americans using a flying boat and the Americans saw the flying boat. An air raid on the US fleet was launched but failed to achieve anything and TF 11 ran for safer waters. In my scenario, the Japanese spotted the Americans while remaining undetected and have sprung a clever trap. Attacking at three different points, the Japanese ships are individually less powerful but have better trained crews and have caught the Americans napping.
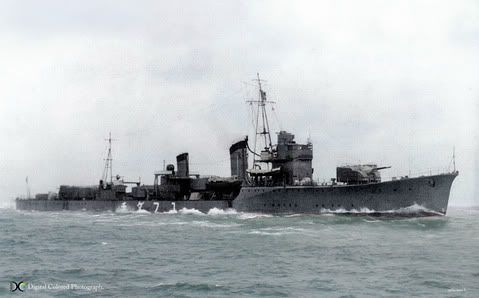
The main Japanese force consisted of their four oldest cruisers, Aoba, Kinugasa, Furutaka, and Kako in Cruiser Division 6. Two light cruisers, Kuma and Tama, attacked from the opposite side. Attacking with Aoba's group was the real-life Destroyer Squadron 6 with six old destroyers, led by the light cruiser Yubari.
On the American side, the carrier USS Lexington was at the center. She was the oldest US fleet carrier to fight in the war and still had her 8" guns installed, which proved to be quite powerful in this scenario. In close protection were three heavy cruisers, USS Indianapolis, USS Minneapolis, and USS San Francisco. Along with them were 8 destroyers, most of which were of the WWI era. A small force had pulled ahead of the main group containing one heavy cruiser, USS Pensacola, and two destroyers.

For this game there was effectively only one objective. The Japanese had to sink the Lexington while the Americans would sacrifice every other ship to save her. To make the American's lives even harder, the Japanese crews were experienced which made it easier for them to hit things while the Americans were stripped of their powerful RADAR directed fire control. Also, USS Lexington was effectively a floating bomb and any time she was hit in the first two turns there was a decent chance a fire would start.
On Turn 1 the Americans turned around while breaking off Indianapolis with two destroyers to assist Pensacola's group in sinking Kuma and Tama. They succeeded the following turn with heavy losses but basically removed themselves from the game as a result. Japanese CruDiv 6 turned to cut off the Americans in a line abreast formation while DesRon 6 began assembling itself into battle formation. USS Lexington hit Kima with her 8" guns making her captain grin wildly at the thought of his carrier engaging in a gun-fight. The cruisers exchanged fire, started a few fires, and Kinugasa blew the old US destroyer USS Litchfield apart with surprisingly accurate fire. USS Pensacola began to flood and poor damage control teams made the problem worse.

Turn 2 proved to be quite bloody for both sides. USS Lexington and her escorts continued running despite the Japanese ships in front of them. CruDiv 6 turned to starboard to clear all their guns for action while DesRon 6 just kept racing forward. Lexington was hit several times and a fire which would last the who game was started. USS San Francisco took an engine hit but caused a magazine explosion on Aoba which blew the Japanese cruiser apart. Furutaka burst into flames thanks to accurate fire from USS Minneapolis but remained afloat and fighting. USS Lexington continued her destructive streak by sinking Yubari.
On the other side of the board Kuma was sunk by USS Indianapolis but managed to sink USS Porter and USS Pensacola with torpedoes. Tama hit USS Winslow with gunfire but didn't sink the plucky destroyer and then fled the board with a mangled hull and raging fires that were barely extinguished. With both Japanese light cruisers gone, USS Indianapolis and the surviving destroyers tried to catch up to USS Lexington but didn't make it by the end of the game.

Turn 3 proved to be the decisive turn for the Japanese. DesDiv 6 split in half with three destroyers quickly turning their broadside to USS Lexington while the other three crossed the T of the beleaguered carrier. Continuing her hot streak, USS Lexington sunk Furutaka with accurate gunfire. Kako hit USS Minneapolis and started a flood. USS Minneapolis hit back and started a fire. Then USS San Francisco raked Kako with 5" shells and sent her to the bottom while the destroyer USS Zane blasted Mochizuki apart. But it was too late, three torpedoes slammed into USS Lexington and shattered the proud ship, taking her from 113 hull points to 41 and then quickly to 37 from flooding damage. Fortunately the other three Japanese destroyers all missed.

On turn 4 Kinugasa launched her carefully husbanded torpedo salvo on USS Lexington, hoping desperately to sink the tough ship. But the salvo missed completely while her gunfire was slightly more successful. Kinugasa was finished off by San Francisco and almost all of the remaining Japanese destroyers joined her beneath the waves.

It looked bleak for the Japanese but inept damage control teams finished the work of the Imperial Japanese Navy and USS Lexington capsized. The ripples from this battle will surely echo through the history of the Pacific War. Without USS Lexington the US fleet would never have opposed the Port Moresby invasion and they might not have sent USS Enterprise and USS Hornet off the launch the Doolittle Raid. In addition the loss of CruDiv 6 would create problems for the Japanese. Those four heavy cruisers were vitally important to the Guadalcanal operation. Needless to say, history shifted drastically from this what-if battle.
- Mike, Chicago Skirmish Wargames club member
The basic premise was a real attempt the American Pacific Fleet made to raid the newly captured Japanese port of Rabaul, which became their most important possession in the Southeast Pacific region. But at this point in the war it has just been captured and has yet to be properly fortified. Because of that, Allied command sent Task Force 11, centered on the old carrier USS Lexington, to bomb the base and any warships anchored there.
Historically, the Japanese spotted the Americans using a flying boat and the Americans saw the flying boat. An air raid on the US fleet was launched but failed to achieve anything and TF 11 ran for safer waters. In my scenario, the Japanese spotted the Americans while remaining undetected and have sprung a clever trap. Attacking at three different points, the Japanese ships are individually less powerful but have better trained crews and have caught the Americans napping.
The main Japanese force consisted of their four oldest cruisers, Aoba, Kinugasa, Furutaka, and Kako in Cruiser Division 6. Two light cruisers, Kuma and Tama, attacked from the opposite side. Attacking with Aoba's group was the real-life Destroyer Squadron 6 with six old destroyers, led by the light cruiser Yubari.
On the American side, the carrier USS Lexington was at the center. She was the oldest US fleet carrier to fight in the war and still had her 8" guns installed, which proved to be quite powerful in this scenario. In close protection were three heavy cruisers, USS Indianapolis, USS Minneapolis, and USS San Francisco. Along with them were 8 destroyers, most of which were of the WWI era. A small force had pulled ahead of the main group containing one heavy cruiser, USS Pensacola, and two destroyers.
For this game there was effectively only one objective. The Japanese had to sink the Lexington while the Americans would sacrifice every other ship to save her. To make the American's lives even harder, the Japanese crews were experienced which made it easier for them to hit things while the Americans were stripped of their powerful RADAR directed fire control. Also, USS Lexington was effectively a floating bomb and any time she was hit in the first two turns there was a decent chance a fire would start.
On Turn 1 the Americans turned around while breaking off Indianapolis with two destroyers to assist Pensacola's group in sinking Kuma and Tama. They succeeded the following turn with heavy losses but basically removed themselves from the game as a result. Japanese CruDiv 6 turned to cut off the Americans in a line abreast formation while DesRon 6 began assembling itself into battle formation. USS Lexington hit Kima with her 8" guns making her captain grin wildly at the thought of his carrier engaging in a gun-fight. The cruisers exchanged fire, started a few fires, and Kinugasa blew the old US destroyer USS Litchfield apart with surprisingly accurate fire. USS Pensacola began to flood and poor damage control teams made the problem worse.
Turn 2 proved to be quite bloody for both sides. USS Lexington and her escorts continued running despite the Japanese ships in front of them. CruDiv 6 turned to starboard to clear all their guns for action while DesRon 6 just kept racing forward. Lexington was hit several times and a fire which would last the who game was started. USS San Francisco took an engine hit but caused a magazine explosion on Aoba which blew the Japanese cruiser apart. Furutaka burst into flames thanks to accurate fire from USS Minneapolis but remained afloat and fighting. USS Lexington continued her destructive streak by sinking Yubari.
On the other side of the board Kuma was sunk by USS Indianapolis but managed to sink USS Porter and USS Pensacola with torpedoes. Tama hit USS Winslow with gunfire but didn't sink the plucky destroyer and then fled the board with a mangled hull and raging fires that were barely extinguished. With both Japanese light cruisers gone, USS Indianapolis and the surviving destroyers tried to catch up to USS Lexington but didn't make it by the end of the game.
Turn 3 proved to be the decisive turn for the Japanese. DesDiv 6 split in half with three destroyers quickly turning their broadside to USS Lexington while the other three crossed the T of the beleaguered carrier. Continuing her hot streak, USS Lexington sunk Furutaka with accurate gunfire. Kako hit USS Minneapolis and started a flood. USS Minneapolis hit back and started a fire. Then USS San Francisco raked Kako with 5" shells and sent her to the bottom while the destroyer USS Zane blasted Mochizuki apart. But it was too late, three torpedoes slammed into USS Lexington and shattered the proud ship, taking her from 113 hull points to 41 and then quickly to 37 from flooding damage. Fortunately the other three Japanese destroyers all missed.
On turn 4 Kinugasa launched her carefully husbanded torpedo salvo on USS Lexington, hoping desperately to sink the tough ship. But the salvo missed completely while her gunfire was slightly more successful. Kinugasa was finished off by San Francisco and almost all of the remaining Japanese destroyers joined her beneath the waves.
It looked bleak for the Japanese but inept damage control teams finished the work of the Imperial Japanese Navy and USS Lexington capsized. The ripples from this battle will surely echo through the history of the Pacific War. Without USS Lexington the US fleet would never have opposed the Port Moresby invasion and they might not have sent USS Enterprise and USS Hornet off the launch the Doolittle Raid. In addition the loss of CruDiv 6 would create problems for the Japanese. Those four heavy cruisers were vitally important to the Guadalcanal operation. Needless to say, history shifted drastically from this what-if battle.
- Mike, Chicago Skirmish Wargames club member